How to Build a Roofing Shed in Toronto
There’s a few things you need to know, a few specifications. So, let’s get started on that now. We’re gonna show you how to do the sheathing on the roof of your shed. There’s a few things that are important.
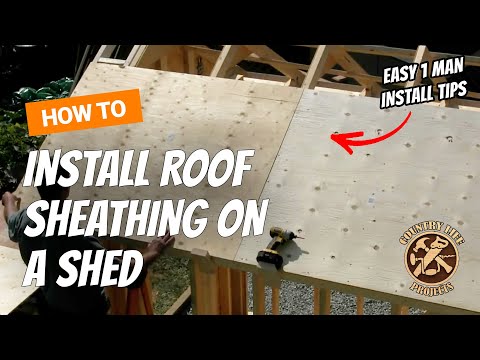
To get started, just want to point out that we put blocking on our sub-fascia to support our panel when we put it up here. Makes it very easy, especially if you’re working on your own. I also have one on the very end over here. That I can just slide my plywood over, butt it up against there. And then just pull it back a little bit, just to make sure we’re not hanging over the edge. And on here, is our joint. So we’re gonna put it. So we also have blocking for the next sheet. The measurement I’m gonna be doing first is just under 80 and a quarter.
That’s allowing for the end here to come in a 1/16th of an inch. I’m gonna go cut that now. I’m gonna be right back, show you how to place that. Okay, we have our sheathing in place. You’ll notice that blocks hold it nicely at the bottom. It is flush across the bottom here. I put a screw in it, just so that I can show you a couple things. It’s halfway on the truss over there. And over here, what’s important to look for, is you wanna be a 1/16th of inch back here and you want this even all the way up.
If for some reason, the end gable here on the ladder is either in or out. Then that means, that your end wall and your gable end of your shed is probably not level and you’ll need to make some adjustments. Either bring it this way or that way. Right now, we’re good. So we’re just gonna finish screwing this panel off. Then we’re gonna go over and do the next panel over there. Once we’re done with that, we’re gonna do the top pieces. And we’re gonna be using H-clips on those. Those are important. When we get there, I’ll show you why. One more thing, just as I showed you on the floor, I don’t know if you can see it on the film, but if you can, there’s lines from the rollers in the mill.
Typically speaking, these are parallel with the end of the panel. So you can actually use these as a guide when you’re screwing into your trusses. The other thing I wanna talk about, is if you’re using OSB, half-inch OSB on your Toronto roof, there’s a smooth side and there’s a kind of rough side to OSB. When you’re using OSB, put the rough side out. If does give you some extra traction when you’re walking on the roof. Also, on the reverse side of this plywood, we have a marking for labeling it as an exterior sheathing. It’s probably best to put it down, if you’re having your shed inspected or if you’re doing this on a house.
That way the inspector can actually see the labeling. He knows it’s exterior plywood, because if the roof’s on here he won’t be able to see that. That’s the only reason for that label on this sheathing. If you’re not gonna be inspected or if you’re not having your shed inspected then don’t worry about it. You can put the label up or down. It doesn’t matter if you’re using plywood. But again, OSB put the rough side up. Other than that, that’s about it for those few tips. Okay, got this piece cut. You lay it up here. Make sure you got about 1/16th of an inch space between this and the next panel. That’s just for expansion and contraction. We’re about a 1/16th of an inch in on the end here. But I didn’t mention in the previous section, is the spacing for the screws, about every eight inches across the bottom, every eight inches up. I’m gonna screw screw this sheet off. I’m just gonna show you a little safety thing you should do before you climb on the roof.
I’m only screwing as far I can reach safely. (drill squeals) It’s a good idea, too, when you’re screwing along edges to pair them up, not have them randomly spaced. (drill squeals) Also when you’re laying these in place, make sure the plywood isn’t sticking past here on the sub-fascia. That’ll interfere with your finished fascia board. (drill squeals) Okay. I’ve screwed off what I can reach. Now, what I like to do before I climb on the roof, is put a two by four cleat on the bottom. Make sure you’re near a truss, just for, right in the center or you can screw it in there. You want to screw through into solid two by four, putting it right at the bottom is a good bet. Make sure you’re using three inch screws. And one every 16 inches to two feet, should be sufficient. Remember this is just a safety feature. Now that that’s on there, can safely climb up here and if I was to slip, I got that to grab onto.
So the next thing we’re gonna do, is we’re gonna rip our pieces for the top here. Just measure straight down from the peak, minus an 1/8th of an inch. We’re gonna have an 1/8th inch space here. That’s important. The H-clips we’re gonna put on here, which I’ll show you later, automatically provide the correct spacing, so you won’t have to worrying about sizing that up. So, I’ll finishing screwing this off. We’ll get our pieces ripped. We’re gonna stagger ’em, the same way did the floor. So we’ll be back shortly to show you that. Okay, we’ve gone ahead, placed all our plywood on the last run here. We have staggered the plywood, just like on the floor. This was a larger roof, you’d wanna go four feet and then eight feet. But because of the size of the roof, this is how it works out. It’s one truss difference. Another important thing to know about. In between your trusses, where your plywood joins together, you should have an 1/8th of inch space and use H-clips.
Reason for that, you don’t have these in place here, your plywood can push past the other sheet of plywood. What’ll happen when you’re shingles are on here, they’ll crack. So, you gotta put these in, they’re really easy. They look like that. Typically come in bags like that. And you just slide ’em onto the edge of the plywood, in the center of your space between your trusses.
Next sheet comes in, it just slides into place. Also automatically gives you an 1/8th inch space. Very handy and definitely will add life to your Toronto roof. That’s about it for this side here. Just the same as on the lower sheets. Make sure you’re in a little bit from the ends. Nice and tight to the peak. Once you have this side done, you can remove your spacing brace on this side. And do the other side exactly the same way. Now also, if you’re using a vented ridge, and you’re gonna insulate your shed, you may want to cut this back a little bit from the peak. Check with the vent for the ridge that you’re buying, the company, what their instructions are for that. If you’re not insulating and you’re not putting a ridge vent up here, don’t have to worry about it. Just keep it tight. You don’t need any backing here for the top. The two pieces coming together will be more than strong enough for the ridge on your roof when we do the asphalt shingles.
So go ahead, finish the other side. We’re gonna do that. Go ahead and do that. And then, we’ll come back and I’ll show you some detail on how we’re gonna do the fascia. And why we’re doing the roof first and some of the things that we’re not doing that you might expect we were..
Check this for more information
How to Build a Roofing Shed in Toronto was originally published on Toronto Roofing Company-Roof Repair Toronto-(647)-847-8826
from WordPress http://ift.tt/2BULvV5
via IFTTT
More info at www.toronto-roofer.com
No comments:
Post a Comment